10 NEW Best Practices for How-To Training Videos
by Catie Foertsch
It’s a good bet that your company needs how-to training videos, to help your customers understand how to use your products, and how to trouble-shoot them. While you might be tempted to make your videos the way you’ve always made them, you should know that best practices have changed. To make more effective how-to training videos, you need to understand these new best practices.
It used to be that making how-to videos meant getting a product expert, filming them talking through the whole process of assembly, operation and troubleshooting, and then adding a few visuals. But that’s changed.
You can still make your videos the old way, of course. But if you do, you’ll find they perform poorly. Today’s viewers want something different from their how-to and training videos.
To make how-to videos that engage your customers and make them happy, follow these 10 new best practices.
1. Make your concept easy to understand, and your expert easy to follow.
Too often, experts forget that they’re way ahead of your customers. Your experts can include industry jargon and too many technical terms in their scripts, because they’re comfortable with high-level language around your product.
But – your customers are NOT experts. They’re watching your videos because they don’t understand how your product works, or because it won’t work. They need a simple explanation, not jargon.
After you or your expert writes your video scripts, ask someone who isn’t an expert to read through them, and provide feedback.
This step will help ensure that your videos are easy to understand.
2. Consider your choice of presenter carefully
Viewers who are looking for how to do something don’t really care who does the presenting – as long as the presenter is comfortable on camera, and comes across as friendly. A presenter who is stiff, awkward or visibly uncomfortable on camera – even if she is an expert – will make your videos less watchable.
Instead of an awkward expert, consider using someone else who is more engaging. Or, consider an actor. They’re less expensive than you think, and they’ll add an extra layer of professionalism to your videos.
3. Enable self-directed exploration of topics by making several short videos
Packing all your information into one single long video forces your viewers to watch a lot of material they don’t care about, just to find the one minute section they’re looking for.
Self-directed learning is a proven way to enable better learning. Plus, people don’t like it when you waste their time. To make today’s viewers happy, break your long videos down into short segments, each focused on one simple topic. This way, your viewers can jump right to the information they’re seeking.
4. Clear titles are critical
Sometimes putting a title on your videos is an afterthought. And sometimes those titles can be vague or obscure. How often have you seen “Video #4”? Or, the video file name used as the title? As in, “training_widget_0304016”?
The purpose of a title is not to help you organize your video files. It’s to make it easy for viewers to understand what’s in the video, and to quickly find what they’re looking for.
- Don’t call your video “Training Video #2”
- Do call it “Wonder Widget How-To Video #2: Attaching the handle to the module body”
Make sure your titles clearly and concisely describe what they video is about.
5. Organize your videos to make finding the right topic as easy as possible
You’re making several short videos instead of one long one, and you’ve titled your videos to make them easy to understand. Doesn’t it also make sense to organize those videos in a visually logical way, to make it easy for your viewers to find what they’re looking for? Yes!
The key is ‘visually logical.’ Your viewer should see a collection of thumbnail images with clear, easy-to-read titles, in a place that’s easy for them to find.
6. Make your opener short, sweet, and to the point
Many older how-to videos start with a longer opener that can include cool animations, fun music, photographs, and on-screen text. These older openings can be as long as 30 seconds.
For today’s viewers, 30 seconds is forever.
No one wants to watch 30 seconds of opener. Plus, very often people will watch more than one of your how-to videos. If you really want to frustrate them, make them watch your 30-second opening every time they access one of your how-to videos.
Again, people want their information quickly. And they don’t like it when they have to watch something they’re not interested in. So make your opener short and on point.
7. Shorten (or skip) your intro
The intro is where the presenter says, “Hi, I’m Stewart Smith, and today I’m going to talk to you about how to assemble the Gizmo, from Company ABC.” Then Stewart gives a little information about the Gizmo. The information he gives can sound a lot like a sales pitch, because he tells you what the Gizmo does, how cool it is, how it makes your life easier.
But wait – your customers have already bought the Gizmo!
They don’t need the sales pitch, and they don’t want it. They want to know how to assemble their Gizmo. So jump right in, and give them what they want.
Now hold on, you might say. Don’t people need to be oriented first?
Yes they do. And you can do it in one sentence, like this: “This video will show you how to assemble the Gizmo. First, start with the …”
You don’t have to stick to these exact words. But you should script your intro in the spirit of getting right to the point, because that’s what your viewers want you to do.
And remember – your presenter doesn’t have to introduce himself or herself. If they’re an expert, you can show their name and title as on-screen text. If your presenter is an actor, you can skip the onscreen title.
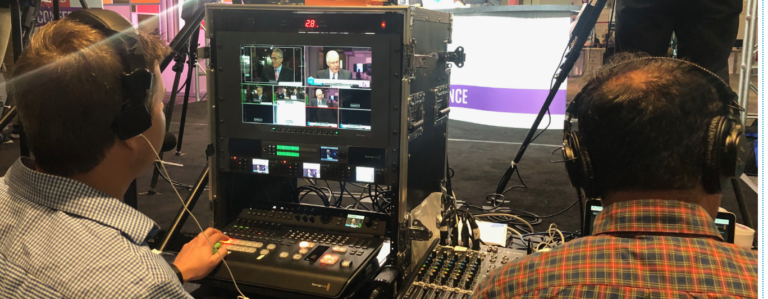
8. You can’t have too much b-roll
B-roll refers to the supplemental video you use in addition to the shot of the presenter talking to the camera. B-roll is what your audience wants to see, for a couple reasons:
-
B-roll shows the thing they’re interested in
-
B-roll is more fun to watch than your presenter talking
Don’t keep your presenter onscreen for very long. Instead, cut to shots of what he or she is talking about. Show the repair being made or the product being assembled. Remember – your audience will learn best when they hear the presenter telling them what to do AND when they see exactly what she’s talking about.
9. Use close-up shots
Wide shots are good for letting your viewers see the whole Gizmo (if it’s a big Gizmo), and for showing the presenter next to the Gizmo. But, after you’ve given your viewers a wider shot, use close shots so they can see clearly as your presenter explains.
To add visual interest, you can vary your close shots, alternating between a medium close and a tight close, and changing the angle on your close shots.
10. If necessary, use other visuals in addition to b-roll
If your audience needs to understand something that can’t easily be shown with video, make sure to add a diagram so they have the best possible chance of understanding what’s going on.
For example, if you’re talking about a pump and it’s critical for your audience to understand the direction of the fluid inside the pump, a diagram is a very good way to show them what’s going on.
You can also add simple animations to your diagram, to illustrate your concepts. You might use animated arrows to show which way the fluid moves inside your pump.
Animations can also be used along with video. With your pump, you might add animated arrows to a video shot of your pump, allowing people to visualize what’s happening inside.
However you decide to use additional visuals, make sure they’re clear and easy to understand.